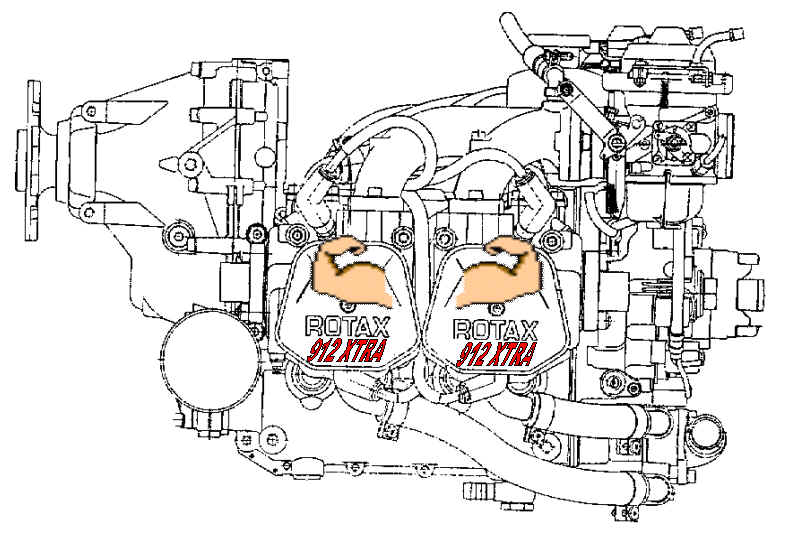
| CONVERT YOUR ROTAX 912 TO THE 95 HORSEPOWER |
FEEL THE SURGE OF ANOTHER 15 HORSEPOWER! Below is the complete 912 XTRA upgrade kit instruction manual (as of 2/26/04). |
| 1.
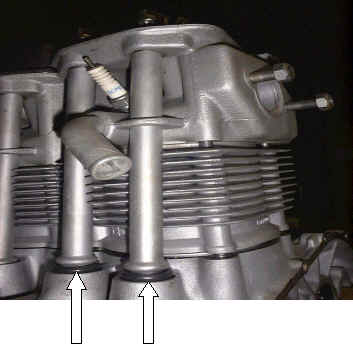
Drain coolant 2. Remove the two allen head bolts on the top of each head that hold the water hose manifold, being careful not to lose or damage the "O" rings that are between the manifold and the head. The water hoses on the bottom of the heads are removed by loosening the hose clamp and slipping the hose off of the nipple. 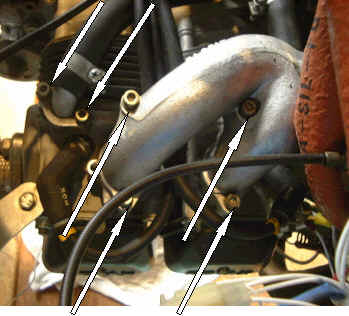 3. Remove the four allen head bolts that secure the intake manifold to the heads, leaving the cables, fuel lines and carburetors attached to the intake and be careful of the "O" rings that are between the manifold and the head. |
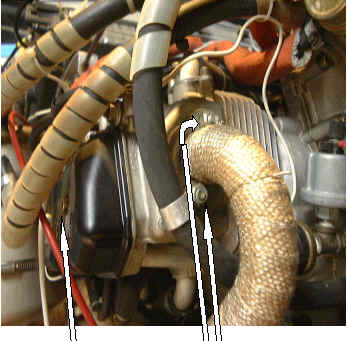
6. Disconnect any exhaust gas temperature or cylinder head
temperature probes and wires. |
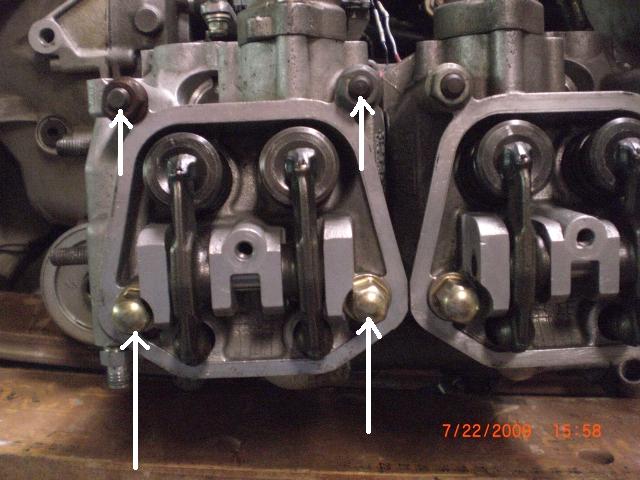 7. Remove the four bolts that hold the head and cylinder in place. Carefully rock the head back and forth while pulling and the head will come loose and slide off of the mounting studs. Leave the rockers and pushrods in place. It is best to use a reverse cross torque sequence to loosen these bolts so you don't warp the heads and cause them to not seal properly when you put the engine back together. |
|
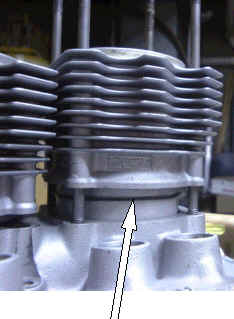 10. Now slide off both of the cylinders, be sure to keep the parts grouped with place they came off of, (cylinder 1, head 1, cylinder 2, head 2,ect). Also take care of the "O" rings at the bottom of the cylinders. 11. Pack a rag at the opening to the block where the connecting rod comes out to keep foreign objects from getting inside of the block. |
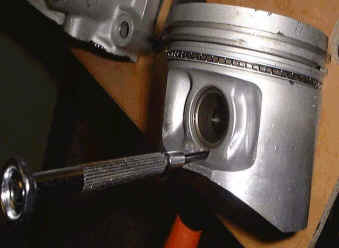 12. The wrist pin circlip can be removed by inserting a small screwdriver in the notch at the bottom of the wrist pin hole and pry the clip out. NOTE; New circlips are supplied with
your new pistons so you don't have to worry about bending the old circlips. |
 13.
Use a wrist pin puller to pull the wrist pin out so you can remove the piston from the
connecting rod. Do both pistons on the same side of the engine. Pull the wrist
pin all the way out as you will need them for the new pistons, also remember to keep the
wrist pins, cylinders, and heads grouped together, (all cylinder 1, all cylinder 2, etc.) 13.
Use a wrist pin puller to pull the wrist pin out so you can remove the piston from the
connecting rod. Do both pistons on the same side of the engine. Pull the wrist
pin all the way out as you will need them for the new pistons, also remember to keep the
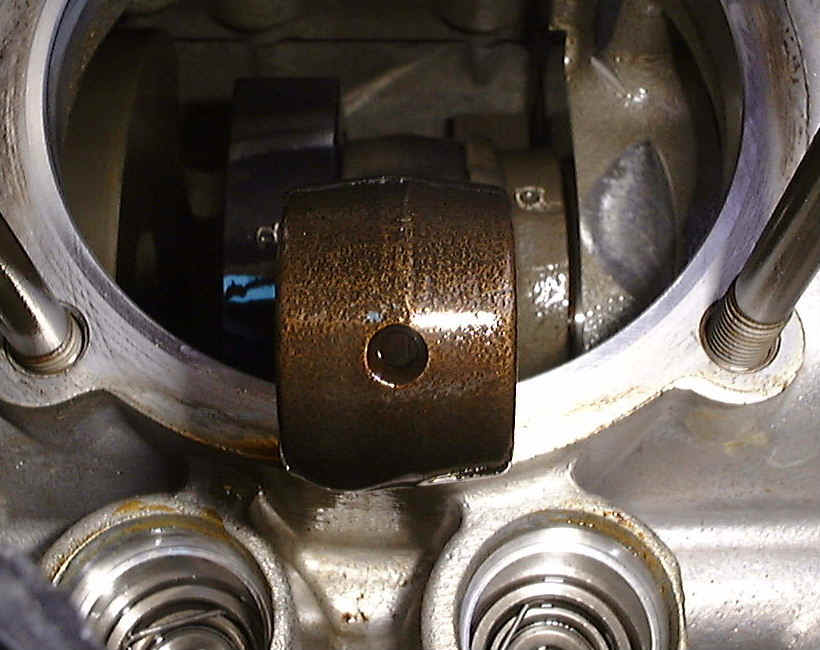
wrist pins, cylinders, and heads grouped together, (all cylinder 1, all cylinder 2, etc.)ATTENTION: Do your con rod ends look like,
CAUTION; When the new pistons are installed and the wrist pins are in place be careful when moving the crank shaft so you don't get the pistons jammed in the cylinder hole in the crank case, this could dent or score the new piston. Wrap a soft cloth around the new piston to protect it until the cylinders are installed. |
CAUTION; In the next few steps you will be working with the piston rings, these are
hard and brittle. Take care not to open them up any wider than
needed to take them off of the old pistons or put them on the new ones because they will
break!! Also, you must observe the proper oreintation of
the rings. You will notice that the top ring has a dot on the top, this must face
up, the middle ring has a beveled edge and this must also face up, also on the middle ring
at the ring gap written very faintly are the words "Elco" on one side of the gap
and "Top" on the other, these face up. The bottom or oil scraper can go
either way but should go back in the way it came out. 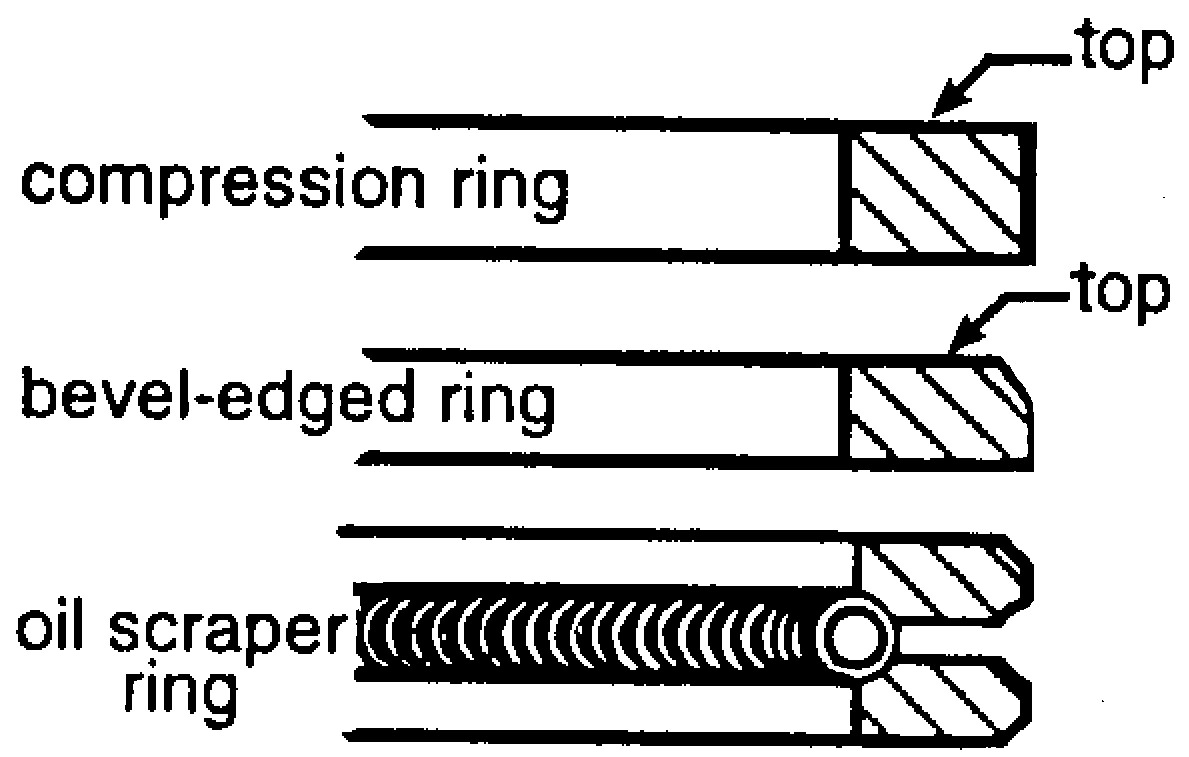 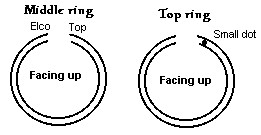 Now is a good time to check the end gap on your old piston rings. Take the rings off of the old pistons and put them down in the cylinder, one at a time, using one of the old pistons to push it down squarely about 1/2". With a feeler gauge, check the gap between the two ends of the ring. In the Rotax maintenance manual the maximum gap on any of the three rings is 0.04" or 40 thousandths of an inch. If the gap is wider than that then you need new rings. 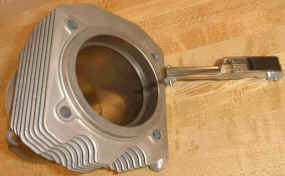 The next thing you will do is put one of the circlips into the new piston. Study your particular installation to determine which side of the piston will be the easiest to install the wrist pin, then install the circlip on the other side, after the wrist pin is installed the other circlip will be installed. |
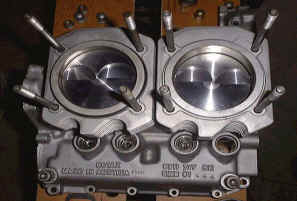 14. Now take two of the new pistons. CAUTION; Examine the pistons carefully. You will notice, looking at the face of the pistons, that two of them have the small half moon valve relief on the right and two of them on the left. You will need one of each for the left side of the engine and one of each for the right side. 15. Now, install the rings from the old pistons or if you have new ones install them. Also install one of the new circlips, provided with the new pistons, on one side of each piston paying attention to your best access when installing the wrist pin. 16. Now install the pistons on the connecting rod with valve relief half moon up and the smaller valve relief to the outside of the cylinder or towards the exhaust port. Push the wrist pin all the way through until it is tight up against the circlip you installed in step 15 then install the other circlip. Make sure that the circlips seat all the way into the groove in the piston. |
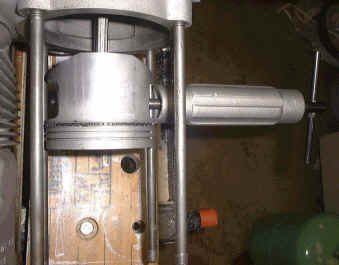
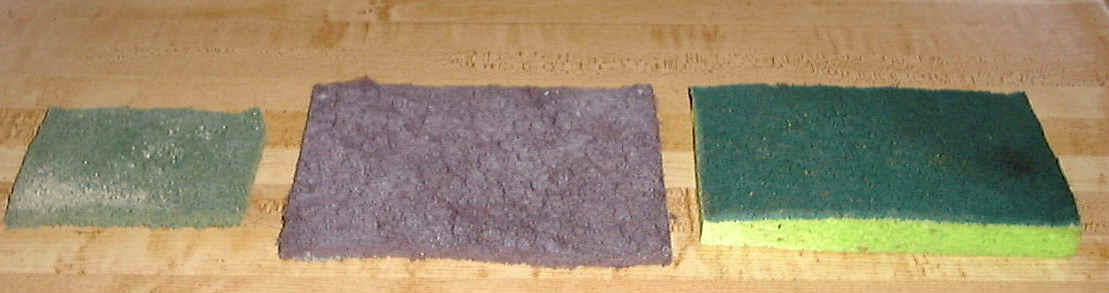 17. Clean the cylinders with a scotchbrite pad (the pad like you use to clean the dishes or you can buy the pads at your local home center or auto store), and carburator cleaner, then lightly oil. 18. Use a split type ring compressor and install cylinders on the pistons. Make sure that the "O" ring is on the base of the cylinder and is seated properly. CAUTION;
Now is a good time to examine all of the "O" rings before reassembly, it
is important that they all be in perfect condition so you won't have leaks when you are
done. |
| 19. After the first cylinder is in place rotate
the crankshaft to move that piston down and the other one up and install the
cylinder on that piston 20. Now install one cylinder head making sure that the pushrod tube to crankcase "O" rings are in place at the end of the pushrod tubes, and work them gently into the crankcase holes being careful not to pinch them, now install the other cylinder head on the same side of the engine. Install both of the top water manifolds making sure that the orange "O" rings are at the bottom of the hole. After the heads are installed, but not torqued, it is necessary to line-up the two heads by means of either the Rotax head alignment tool, or install the bolts for intake manifold just snugly enough to insure that the mating surface between the intake manifold and the heads make a good seal. Torque the head bolts to 12FT. lbs in a criss-cross pattern on both heads, then do the same up to 20FT. lbs. then tighten down the intake manifold to 90 inlbs 21. With the higher compression we are recomending the cooler spark plugs used in the 912S, they are the NGK-DCPR8E torqued down to 180 inch pounds and gapped to .022 You will also need to run high octane fuel, 92, 93 from your auto gas station or 100LL from your airport. 22. Install the exhaust, slide the water hose on the bottom hose nipple of the head, hook up the spark plug wires, EGT and CHT sensors, follow the same procedure for the other side of the engine. 23. When the piston installation is complete rotate the prop to make sure you have no valve to piston contact. 24. Fill the coolant system and bleed out the air. 25. Start the engine, operate normally. FEEL THE POWER! |
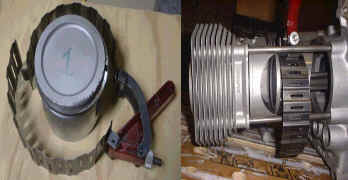
 1 2 3 1. Wrist pin puller 2. Circlip installer 3. Split type ring compressor These are some of the tools that may be needed in the upgrade to the 912 XTRA, these are not necessary but would make the job much easier. |
GET THE COMPLETE 912 XTRA |