On 912's manufactured after about 1995 the end of the
connecting rod was drilled to allow oil into the center of the wrist pin. We have
run the engines with and without the holes and found no difference. We feel that we
should notify the customers of the 912XTRA upgrade kit that Rotax felt that it was necessary to have these holes and
that we should give some instructions on how we have added them to some engines. If
the customer feels that as long as the engine is apart they want to update their engine,
this is how we did it.
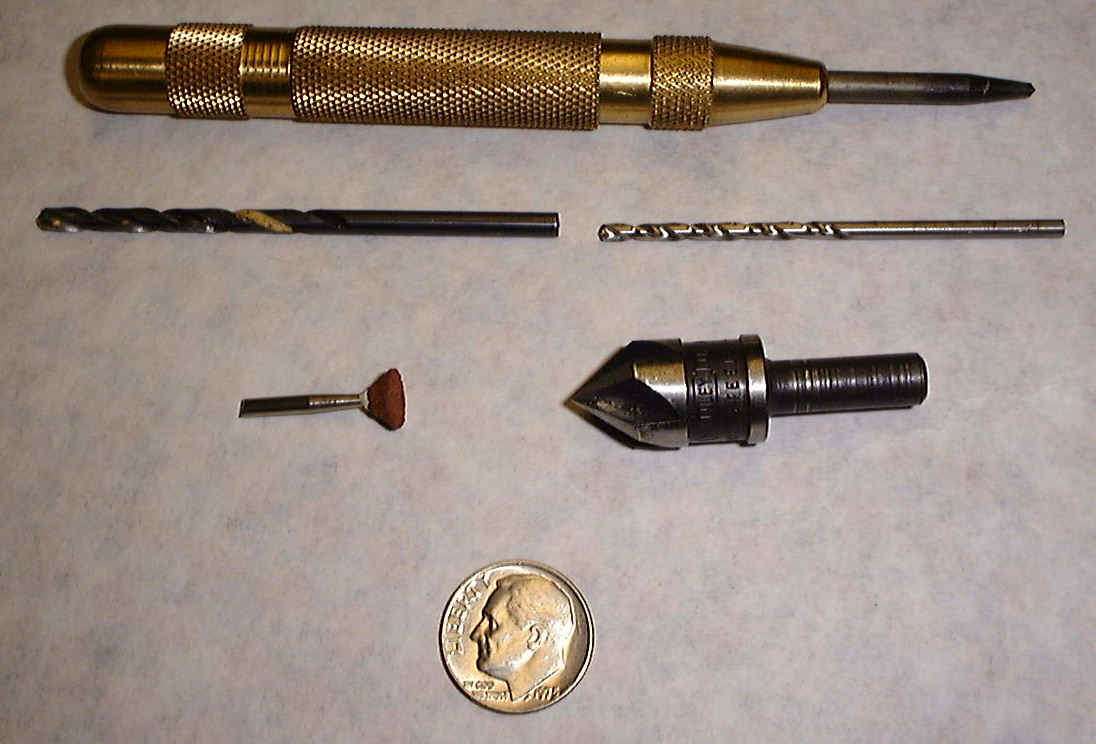
You will need the
following; Variable speed drill, sharp 3\32" drill bit, sharp 1\8" drill
bit, counter sink bit, small dremel stone, a piece of 1\2" wood dowel
rod, center punch, patience!
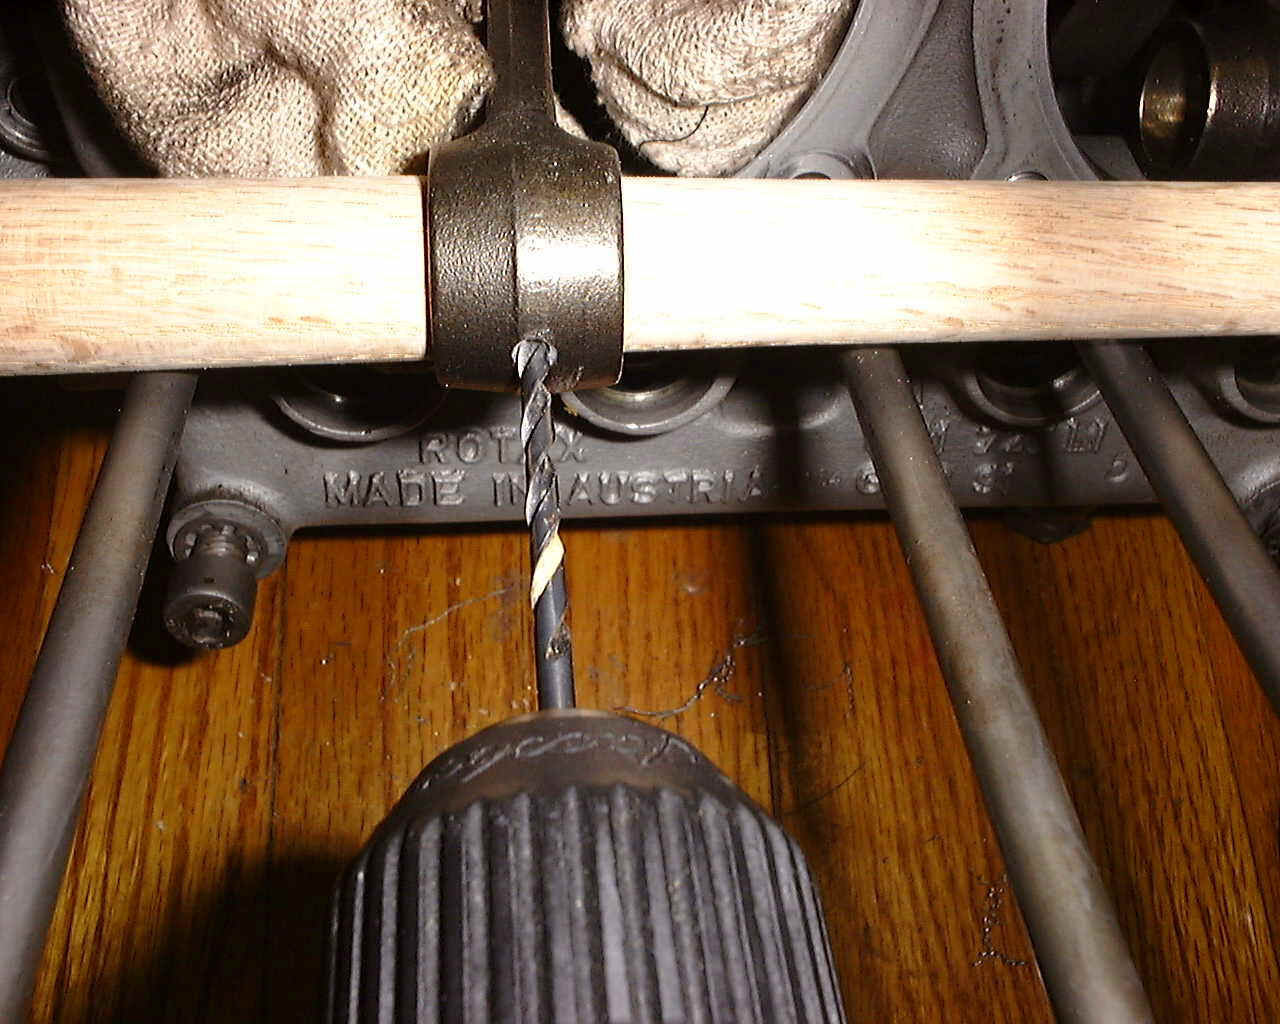
First; With the pistons
removed decide on a connecting rod and turn the crankshaft until the rod is sticking all
the way out of the case. Mark the top center of the connecting rod and insert your
piece of 1\2" dowel rod through the wrist pin hole so that when the drill bit comes
through you don't go all the way to the back and damage the back of the wrist pin hole,
also put a clean rag in the cylinder hole to keep out metal cuttings. Now take the
3\32" drill bit and drill through where you marked the connecting rod, then change to
the 1\8" drill bit and enlarge the hole up to 1\8".
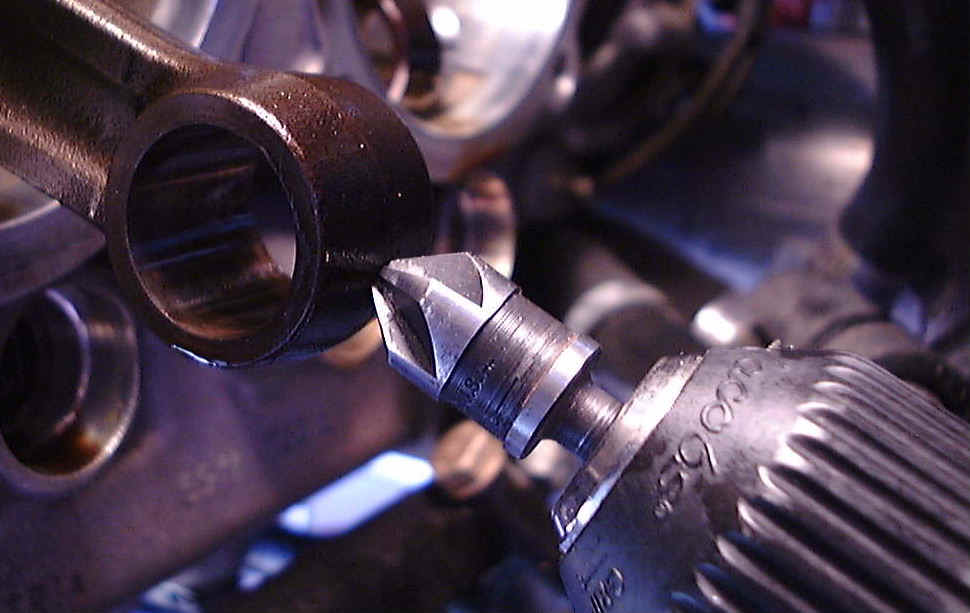
Now take the counter sink bit
and chamfer the outside of the hole just enough to remove the sharp edges of the hole.
Don't try to use a larger drill bit for this because it will not give a nice smooth
even chamfer all around.
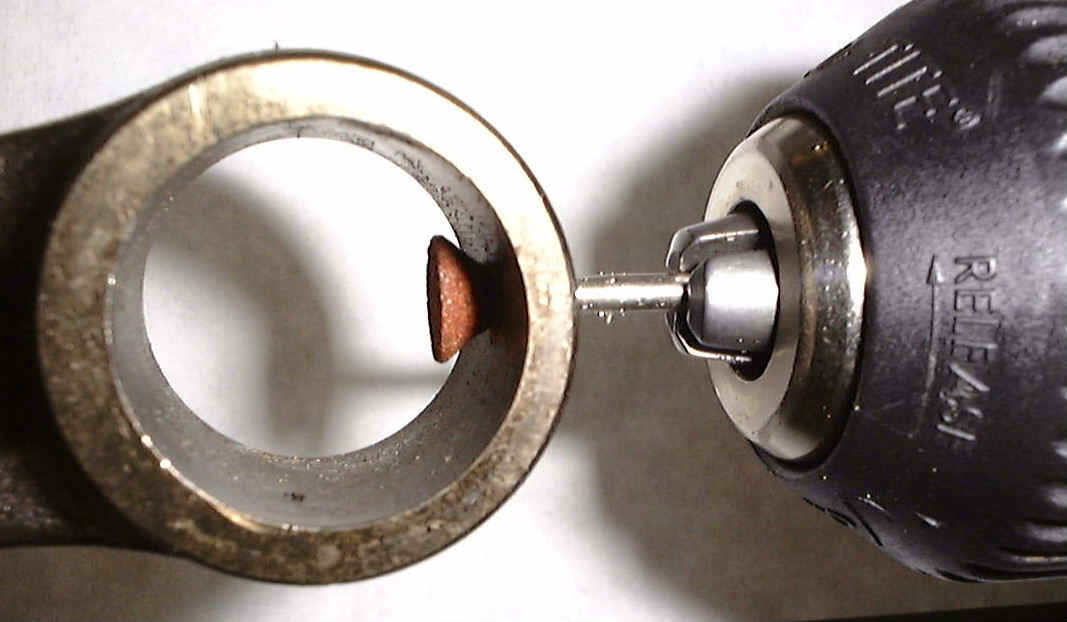
Take the small dremel stone,
similar to the one in the picture of the tools needed, and cut the shaft of it short
enough so that you can put it inside of the wrist pin hole and bring the shaft out of the
hole you just drilled. Now carefully hook this up to your drill and put just a
light pulling pressure on the stone and run the drill at slow speed for about 2
seconds, just enough to remove the flashing that the drill bit left when it came
through. Take a wrist pin and push it through the wrist pin hole and if it goes
through smoothly you are done, if you feel it hang up at all put your dremel stone back in
and run it for another 2 seconds. This is where you need the patience, you
don't need to grind on this it's a very light duty thing, you just need to remove enough
material to allow the wrist pin to go through smoothly. Once you are satisfied that
the wrist pin goes through smoothly move on to the other 3 connecting rods and when you
have all four finished, continue with the installation instructions.
CLEAN UP EVERYTHING BEFORE YOU CONTINUE TO REASSEMBLE YOUR
ENGINE!!
|